Create a 3d logo using photoshop

In this quick and easy graphic design tutorial, you’ll discover a handy process for generating eye-grabbing three-dimensional typography with the help of Photoshop and some creative techniques.
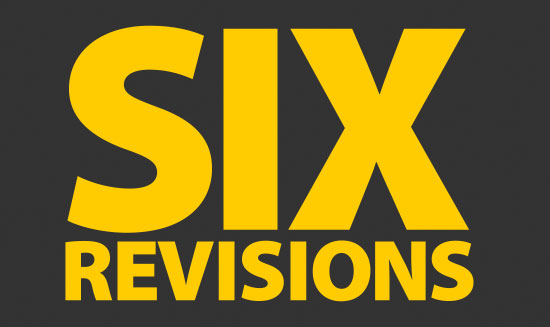
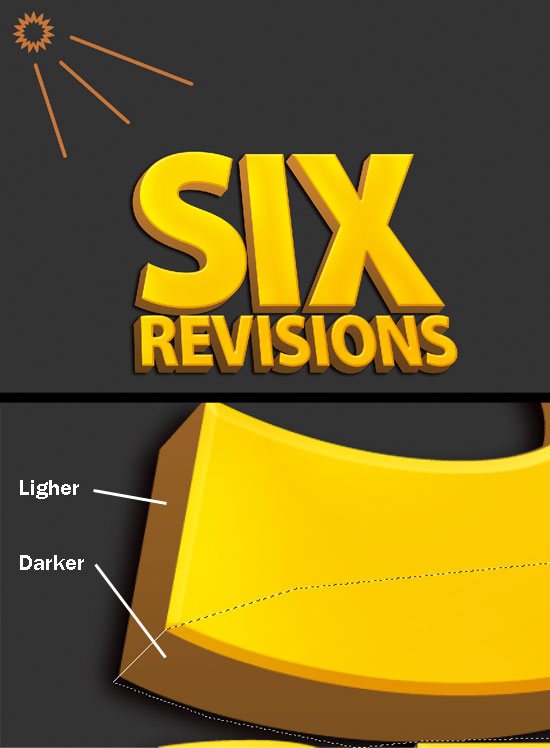
Final Result
Here is a preview of what we’ll be working towards (click on the image to see the result in full-scale).

Setting up the Photoshop document
1 First off, we are going to open up Photoshop and create a new document (Ctrl + N). In the New document dialog box, set the Width and Height units to inches (if it isn’t already). We’re creating a square canvas; set the width and height to 10 inches. We’re creating a graphic that’s high resolution and ready for print use, so set the Resolution to 300 pixels/inch.

2 With your canvas created, fill the Background layer with a dark gray (#333333) color. One of the ways you can do this is by first setting your Foreground color to the dark gray color (in the Tools panel). Then choose the Background layer in the Layers Panel and press Ctrl + A (which creates a marquee selection around the entire canvas – you can also do this via Select > All). Finally, choose Edit > Fill (Shift + F5) to open up the Fill dialog box, make sure that the Use option is set to Foreground color, and then click OK to apply the fill.
Creating the text
3 Now we’ll place the text on the canvas. Choose the Horizontal Type Tool from the Tools panel and type the text/logo that you desire. Change the color of the text in the Options bar to a yellow color (#FFCC00), use a rather large font size, and try to choose a bold font type as the technique works best this way. The font used here was Myriad Pro Black set at 286pt for the word ‘Six’ and 83pt for the word ‘Revisions’. Start typing the text on the center of the canvas; this tutorial uses the text ‘Six Revisions’, but of course, feel free to modify it.
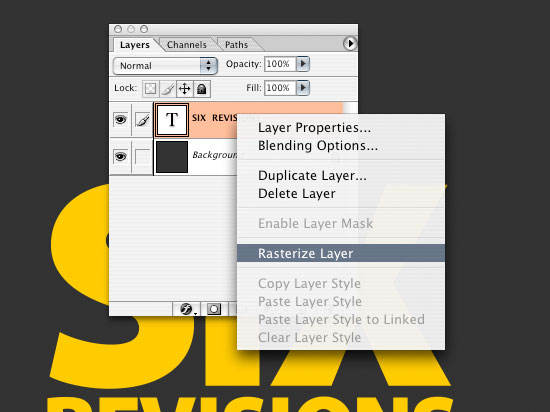
4 Rasterize the text so that we can more easily work with it; this has the side effect of not being to modify the text anymore so make sure you’re happy with the text. Right-click on the text layer and click on Rasterize Type (or Rasterize Layer depending on what Photoshop CS version you’re using).
Using Free Transform on the text
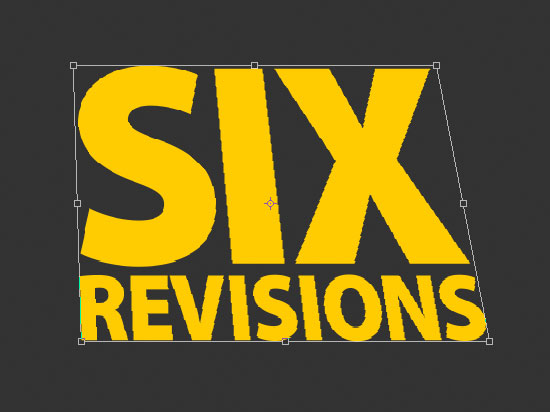
5 Now we are going to skew the text to give it more of a dramatic 3D look. Make sure you have the layer with our text selected in the Layers Panel, then press Ctrl + T to let us edit under Free Transform (Edit > Free Transform).
6 Holding down Ctrl, click on the top right transform control of the box. Drag the corner to the left. Do the same with the top middle transform control. You should get something like what I have below.
Adding some layer styles
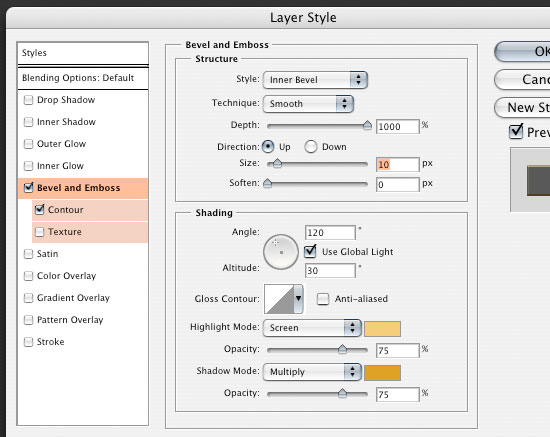
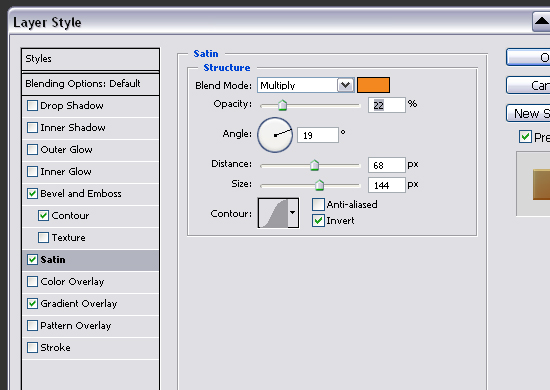
7 We are going to add some layer styles to our text. Make sure that the text layer is selected in the Layers Panel, and then click on the Add a layer style icon at the bottom of the Layers Panel. Choose Bevel and Emboss, which will open up the Bevel and Emboss Layer Style dialog box. Set it to the settings that I have below; this will make the edges of the text really pop. Don’t forget to change the colors for the highlights and shadows. The highlight is #FFCC66 and the shadow is #DFA125.
8 Go back into the Layer Styles dialog box (if you exited out of the Layer Styles dialog box, just double-click on the layer in the Layers Panel to go back) and apply a Satin layer style. This will give some depth to the color on our text instead of just a solid or gradient. Change the color to #F3881F.
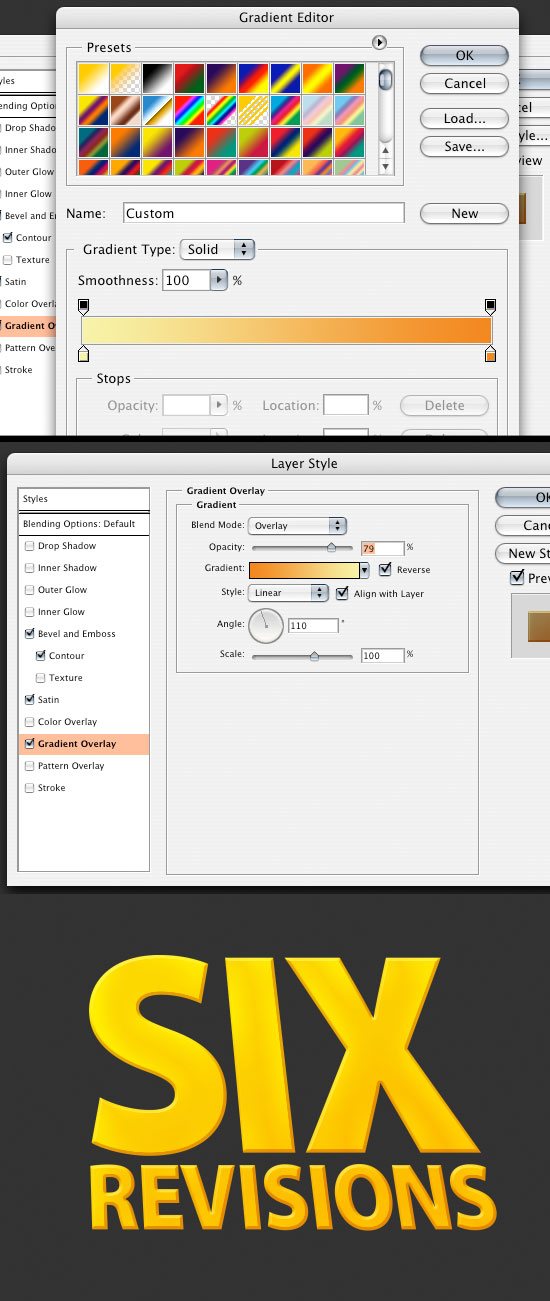
9 The last thing we are going to do to the text’s face is add a Gradient Overlay layer style. Click on the gradient and change the left color stop to #F7F3A7 and the right color stop to #F3881F.
Creating the 3D effect
10 We are going to start giving this text a 3D look. First, we want to duplicate our text layer; choose the layer and press Ctrl + J to duplicate the layer. Go to the duplicated layer and get rid of the layer styles by clicking and dragging them into the trash can icon at the bottom right of the Layers Panel.
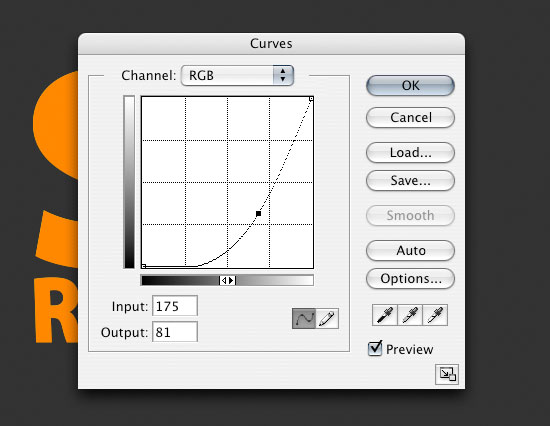
11 Now that we have a logo with no layer styles, we are going to adjust the color. Open up the Curves options by choosing Image > Adjustment > Curves (Ctrl + M) and adjust them to something like I have below to give the layer a darker color.
12 We want to drop down the saturation because the color is too vibrant to be a shadow. Go into Hue/Saturation with Ctrl + U (or Image > Adjustments > Hue/Saturation) and adjust the settings like I have below.

13 Now, we are going to create the edges of our text to make the three-dimensional look. First, we want to click and drag our layer below the original yellow text layer and move it one space to the left with the arrow key. Holding down Alt, push the down and left arrows repeatedly. This will duplicate the brown layer each time you push the arrow button. Keep duplicating the layer until you get the size and depth that you like.

Combine the duplicated layers
14 Let’s combine all of these duplicated layers into one. To do this, click on the topmost brown text layer in the Layers Panel, hold down Shift, and then click on the bottommost brown text layer to select all of them. Then with all the appropriate layers selected, click on the Link layers icon at the bottom of the Layers Panel. A chain link icon should appear on all the brown text layers when you click on it. Once you link all the brown text layers together, select all the layers in the Layers Panel again (if you somehow deselected them) and press Ctrl + E to merge down all the linked layers together.
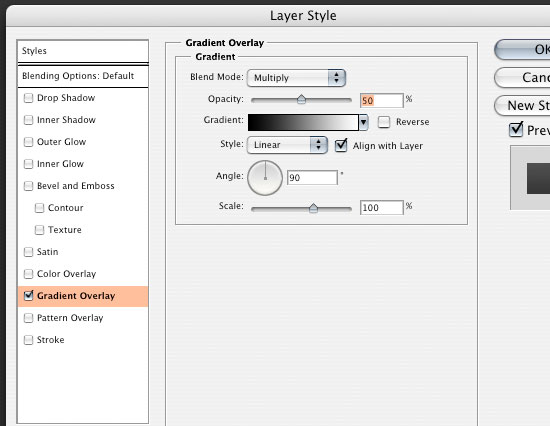
15 Let’s add a Gradient Overlay layer style on our combined text edge layer so it goes with the gradient on our yellow text. The colors are black (#000000) and white (#FFFFFF) (double-click on the merged layer to open up the Layer Styles dialog box).
Create a drop shadow
16 Duplicate the brown text edge layer with Ctrl + J while it’s selected in the Layers Panel. We are going to use it to create a shadow on our text. Go to Filter > Blur > Gaussian Blur and adjust it so the Radius option is at 8px. Now go into Curves by pressing Ctrl + M and adjust them as I have them. This should give you a blackish shadow.

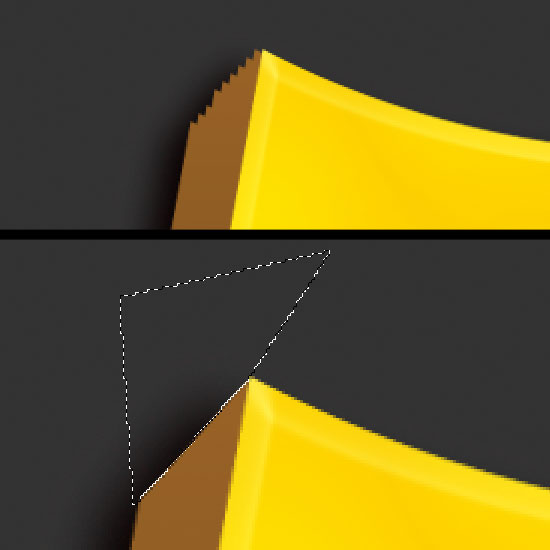
17 If you zoom in at the edges of the letters using the Zoom Tool (Z), you’ll notice that the brown sides coming off the corners are jagged. We’re going to go in and fix those. Using your Polygonal Lasso Tool, click a shape around the area that needs to be removed and push the Delete key. Repeat this for each area that needs it until you get smooth edges on all your letters.
Some optional steps
18 This looks pretty good so far, and we could probably stop here and be happy with it, but if you want to put the extra effort in, we can start adding in some more shadows. Our light is coming from the top left so we should plan to have our shadows at the darkest from the bottom right. To get our shadows right, we are going to use the Burn Tool on the brown text edge layer to darken it. Before we start adding in our shadow, we want to use the Polygonal Lasso Tool to create some edges where there would be corners on the text. Do this for all the corners of our text, holding down Shift and dragging your mouse to add to the marquee selection.
The Burn Tool
19 Now we can start burning in the areas we selected. Change the Burn settings in the Options bar so that the Ranges option is Highlights and the Exposure is at 50%. I also used a brush with a Master Diameter set at 125px with a 0% Hardness.

20 With the same Burn settings all set, we are going to do the rest of the areas that need shadows. Since you should still have the areas selected, we can do an inverse selection, Select > Inverse (Ctrl + Shift + I), then we can burn the areas that we haven’t done yet without burning the areas we have already done.

21 We can also do some highlights too with the Dodge Tool. Use the same brush, the same settings, and the same method that we did with the Burn Tool.

Finished!
There we have it, 3D text using nothing but Photoshop. Here’s what I ended up with:
source: sixrevisions